Guide · Guides
Doing Gel-X at home
No bead to control, no ratio to learn. The skill is fit and prep, and both are learnable in one evening.
Written by Janet H. · Owner, Janet Media Group
Published
Tip & Topcoat is reader-supported. Product links go through our affiliate resolver and we may earn a commission from qualifying purchases, at no extra cost to you. Prices come from Amazon's API, carry the date they were read, and change constantly — the button always opens the current price on Amazon.
Part of the guides hub.
How to apply soft gel tips at home · 8 steps
Step 01
Size all ten tips first
Lay a tip against each nail and pick the width that covers the plate from sidewall to sidewall without pressing into the skin. Write the sizes down — you only do this properly once.
Step 02
Prep the natural nail
Push the cuticle back, shorten and shape your own nail, and remove the surface shine with a light buff. Do not file into the plate.
Step 03
Dehydrate and prime
Wipe each nail with alcohol or a dedicated dehydrator and let it dry. Apply the kit's pH bonder or primer if it includes one.
Step 04
Etch and prep the inside of the tip
Apply the kit's tip prep to the inside of each tip. On pre-etched tips the frosted inner surface is already done for you.
Step 05
Flood the tip with extension gel
Fill the inside of the tip about a third full with the bonding or extension gel, enough that it spreads to the edges without squeezing out onto skin.
Step 06
Place at 45 degrees and roll down
Set the tip against the cuticle line at a 45-degree angle, then roll it flat onto the nail so the gel pushes forward and the air pushes out. Hold still.
Step 07
Flash cure, then full cure
Flash cure for 5 to 10 seconds while holding the tip in place, then cure the whole hand under a full-size lamp for the time the gel brand publishes.
Step 08
Shape, then top coat
File the length and shape you want, buff the seam at the cuticle, wipe clean, then apply and cure a top coat. Oil the cuticles afterwards.
Why this is the home-doable extension system
Acrylic and hard gel both require you to build a nail. There is a working time, a consistency to judge, an apex to place, and the penalty for getting it wrong is a lumpy nail you then have to file flat — on your own hand, with your non-dominant hand.
Soft gel tips remove all of that. The shape, the curve and the apex are molded into the tip at the factory. Your job is to pick the right width, prepare the nail so the bond holds, and cure it. The worst outcome of a mistake is a tip that lifts, which you soak off and redo.
That is why this is the one extension system worth attempting at home, and why the comparison against acrylic comes out as clearly as it does for a home user.
What you need, and what the boxes leave out
A complete soft gel setup is five things. Kits differ mostly in how many of the five they include, and the gap is almost always the lamp.
| Item | What it does | In the kits? |
|---|---|---|
| Tips in your sizes | The shape and length | Always |
| Prep / pH bonder | Dehydrates the plate | Pro kit yes, budget kits often no |
| Tip prep or etch | Keys the inside of the tip | Pro kit yes; pre-etched tips skip it |
| Extension / bonding gel | The actual bond | Usually |
| Full-size UV/LED lamp | Cures the bond | Rarely — check carefully |
Sizing: the step that decides everything
Nine out of ten soft gel sets that lift, lift because of fit. It is worth spending twenty minutes on this the first time, because you then never spend it again.
Lay each candidate tip on the nail and look at the sidewalls. The correct tip reaches from one sidewall to the other and sits flush against the plate at both. A tip that leaves a visible gap at either side is too narrow — that gap is where acetone-free water gets in and where lifting starts. A tip that presses into the skin at the sides is too wide; you can file a slightly wide tip back, so err wide.
Size range is therefore the specification worth paying for. The professional tip boxes run fourteen sizes including half sizes; the 500-piece budget boxes mostly do not publish how their tips divide across sizes at all. If your nails are unusual in either direction, buy the box that publishes its ladder.
Write your ten sizes on a card. Every set after the first one takes half as long.
The three-stage bond, and why all three stages exist
The professional system uses three products before the tip goes on, and each one addresses a different failure.
- pH bonder on the natural nail. Dehydrates and balances the plate so the gel wets it properly. Skip it and the bond fails at the nail side.
- Tip prep inside the tip. Etches the inner surface so the gel keys into it. Skip it and the bond fails at the tip side — the tip comes off clean with gel still on your nail. Pre-etched tips, with a frosted inner surface, do this at the factory.
- Extension gel as the adhesive. The actual structural bond, which needs enough volume to spread to the edges of the tip without squeezing onto skin.
The budget kits collapse stages two and three into one all-purpose bonding gel and rely on pre-etched tips. That works, and it is why those kits are a legitimate route — but it is also why prep on the nail side matters more when you use them, because there is one less thing helping you.
Placement and curing
The placement move is a roll, not a drop. Set the cuticle edge of the tip against your cuticle line at roughly 45 degrees, then roll the tip down flat. The gel is pushed forward ahead of the contact point and the air goes with it, which is what prevents bubbles under the tip.
Hold it still and flash cure for five to ten seconds before you let go. That locks the position. Then cure the whole hand properly under a full-size lamp for the time the gel publishes.
Thumbs cure separately and flat. A thumb pointing sideways under a lamp sits outside the effective light zone and under-cures, which is the single most common cause of one tip lifting while the other nine hold — the full diagnosis is in why gel polish is not curing.
Shaping, and the seam
File the free edge to the length and shape you want. A hand file is enough; you do not need a drill for this, and a drill at the cuticle end is where home users do damage.
The seam where the tip meets your nail at the cuticle is what separates a set that looks professional from one that looks applied. Buff it lightly with a fine buffer until the step disappears to the touch, wipe the dust off, then top coat. Most of what reads as "obviously fake" is an unbuffed seam rather than the tip itself.
Then oil the cuticles — daily, from the next morning. Gel is drying to the surrounding skin and a cuticle oil is the cheapest thing you can do for how a set looks in week two. The picks are in the cuticle oil roundup.
Removal, which is the part you must not rush
Soft gel tips come off in acetone, and that is the entire reason to choose them. Do not undo it by getting impatient.
- File the length off first. Take the tip back to roughly your own nail length. Less material means less soaking.
- Break the top coat seal. A light buff over the surface so acetone can get in. The top coat is designed not to be porous; that is its job.
- Wrap each nail. Acetone-soaked cotton, foil or a clip, and then wait.
- Wait longer than feels necessary. The AAD's method for gel is to wait ten to fifteen minutes rather than prying; a tip is thicker than gel polish, so budget fifteen to twenty-five.
- Push, do not lever. The softened gel should come away like a paste under a wooden stick. If it resists, re-wrap for five more minutes. Levering is what takes nail plate with it.
- Oil immediately. Acetone is drying. Oil the nail and the surrounding skin as soon as the hands are rinsed.
The full removal method, including when a break between sets is worth taking, is in removing gel polish at home and repairing nails after gel.
Picks
What you actually need
The complete professional system, the cheapest box that includes a light, a full-size lamp if your kit only flash-cures, and the wraps the removal takes.
Buying into the original system rather than a copy of it
Aprés Gel-X Signature Kit
The system every other soft gel tip is a version of, sold as one box — and the only one here that is HEMA- and TPO-free through the whole bond.
- In the box
- Prep, Extend Gel, top coat, Omni Light
- Formula
- HEMA-free and TPO-free
Skip ifSkip this if you do not already own a full-size LED lamp. The light in the box flash cures; it does not finish the cure.
A first set of extensions with nothing else to buy
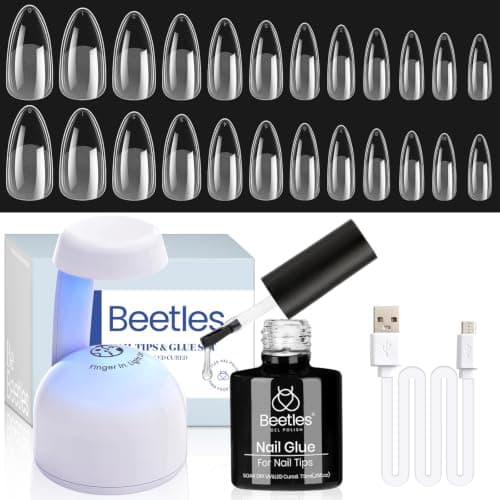
Beetles Etch X Nail Extension Kit
The only box here that contains tips, the bonding gel and a curing light at once, which makes it the cheapest honest route to a first set.
- Tips in the box
- 500, medium almond
- Brand wear claim
- 28+ days
Skip ifSkip this if you want any shape other than medium almond — the box is a single shape, and there is no mixing inside it.
Wide hands, long nails, or curing all five fingers at once
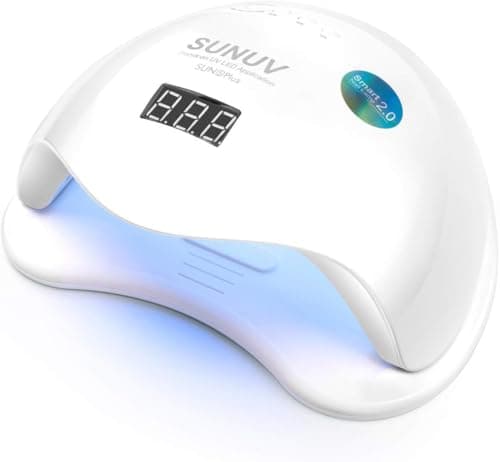
SUNUV SUN5 Plus
The same 48W and the same timers as the SUN5, with half again as many LEDs spreading the cure more evenly.
- Power
- 48W, 36 dual-spectrum LEDs
- Timers
- 10s / 30s / 60s / 99s
Skip ifSkip this if you find gel curing uncomfortably hot. A denser LED array is warmer on the fingertips, not cooler.
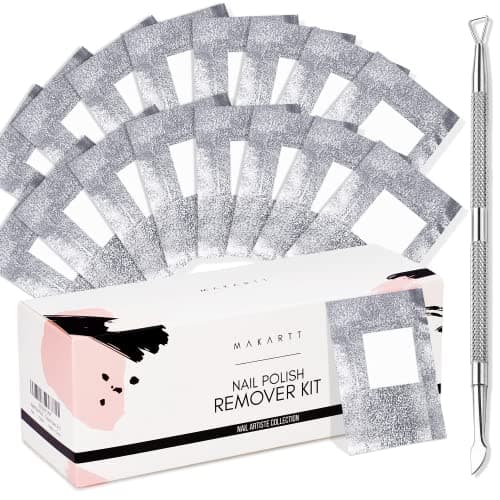
Taking gel off without soaking your whole hand in acetone
Makartt Soak-Off Gel Remover Foil Wraps
Pre-attached cotton on a heavy foil wrap, which is the difference between a ten-minute removal and a thirty-minute mess.
- Count
- 200 wraps with cotton attached
- Foil size
- 9 × 6.5 cm
Skip ifSkip this if you already have plastic food wrap and cotton at home. That combination is what dermatologists actually recommend, and it is free.
FAQ
Frequently asked questions
Can you do Gel-X at home as a beginner?
Yes — it is the most beginner-friendly extension system, because the shape is molded into the tip and there is no bead to sculpt. Budget about 90 minutes for a first set, most of which is sizing all ten nails.
What do you need to do soft gel tips at home?
Tips in your sizes, a nail dehydrator or pH bonder, a tip prep unless the tips are pre-etched, an extension or bonding gel, a top coat, and a full-size UV/LED lamp. The lamp is the item kits most often leave out.
How long do Gel-X nails last at home?
Two to three weeks is normal, and one kit on this site claims up to 28 days. Fit and prep move that figure far more than brand does — a tip that does not reach the sidewalls will lift inside a week.
Do you need a special lamp for Gel-X?
You need a full-size UV/LED lamp, and ideally the one the gel brand recommends. The flash-cure light that ships with the professional kit only holds the tip in position; the brand's own instructions then full-cure under a proper lamp.
How do you remove Gel-X at home without damage?
File the length off, buff the top coat seal, wrap each nail in acetone-soaked cotton and wait fifteen to twenty-five minutes, then push the softened gel off with a wooden stick. Never lever a half-dissolved tip.
Why do my soft gel tips keep lifting?
Usually the tip is too narrow, so it does not reach the sidewalls and leaves a gap. The other common causes are skipping the tip prep — the tip comes away clean with gel left on your nail — and an under-cured thumb.
Keep reading
Related guides
- The best Gel-X kits →
Which box to buy.
- Gel-X vs acrylic →
Why this one at home.
- Why gel is not curing →
If a tip stays tacky.
- Removing gel at home →
The soak-off method.
- The best lamps →
The item kits leave out.
Sources
- —AAD — Removing gel polish at home · aad.org
- —AAD — Reducing artificial nail damage · aad.org
- —UV+EB Technology — using the correct nail lamp for proper curing · uvebtech.com
- —Aprés — Gel-X Signature Kit · apresnail.com
- —Beetles — Etch X 500-piece nail extension kit · beetlesgel.com
- —SUNUV — SUN5 Plus · sunuv.com
- —Makartt — remover foil wraps · makartt.com