Guide · Guides
How to do builder gel at home
Thin layers, a deliberate apex and the right cure time. Everything that goes wrong with builder gel goes wrong in one of those three.
Written by Janet H. · Owner, Janet Media Group
Published
Tip & Topcoat is reader-supported. Product links go through our affiliate resolver and we may earn a commission from qualifying purchases, at no extra cost to you. Prices come from Amazon's API, carry the date they were read, and change constantly — the button always opens the current price on Amazon.
Part of the guides hub.
How to apply builder gel at home · 8 steps
Step 01
Prep the nail
Push back the cuticle, remove any shine with a fine buffer using the lightest pressure that works, then wipe with a dehydrator or isopropyl alcohol and let it dry fully. Do not file the plate thin.
Step 02
Apply a thin base layer
Float one very thin layer of builder gel over the whole nail, keeping it off the skin at the cuticle and sidewalls. Cure it fully before going further.
Step 03
Place a bead at the apex
Pick up a small bead of gel and place it about a third of the way back from the free edge. Do not brush it flat — let it settle for a few seconds.
Step 04
Level the bead with gravity
Turn the finger so the bead spreads into a smooth dome, guiding it with the brush tip rather than pushing it. Keep the perimeter clean.
Step 05
Flash cure, then cure fully
Flash cure for 10 seconds to lock the shape if your product supports it, then cure for the full time the brand publishes. Gelish states 30 seconds full cure on its own LED lamp.
Step 06
Repeat for a second layer if needed
A second thin layer builds strength without trapping uncured gel. Two thin layers always beat one thick one.
Step 07
Wipe the inhibition layer and file to shape
Wipe the tacky surface with alcohol, then file the free edge and refine the apex with a fine file. Buff lightly if the surface is uneven.
Step 08
Seal with a top coat and oil the cuticle
Apply and cure a top coat, wipe if it is not a no-wipe formula, then oil the cuticle. The oil stops the skin drying out around a three-week set.
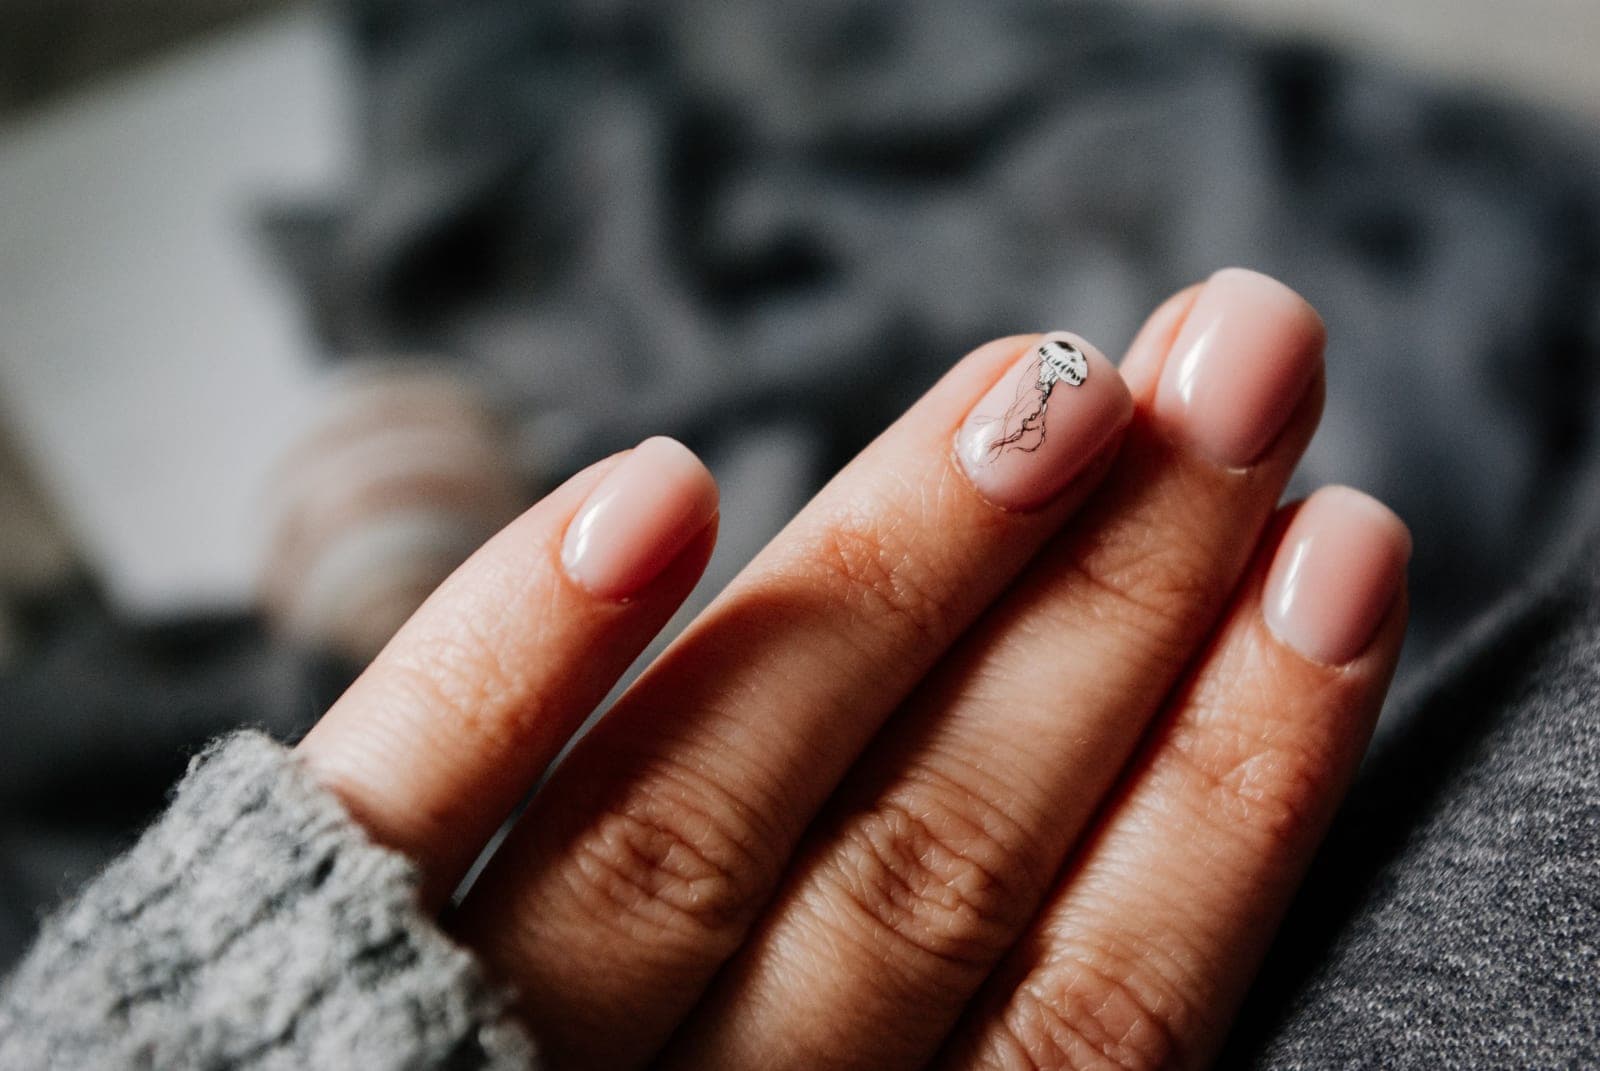
What builder gel is for, and what it is not
Builder gel is the bottled, brush-on version of hard gel. It is thicker than gel polish and thinner than sculpting gel, and its job is to add structure: a thickness and a curve that make a nail behave like a stronger nail than it is.
Two jobs it does well. First, an overlay on natural nails that are peeling or bending — it stops the flex, and the flex is what causes the split. Second, a reinforcement over a soft gel tip at the stress point just past the smile line, which is where those tips crack if they crack at all.
One job it does not do: it is not a length system. You can sculpt an extension with it on a form, and that is genuinely difficult and not where anyone should start. If you want length, use a pre-shaped soft gel tip — the comparison is in Gel-X vs dip powder.
The reason to prefer builder gel over hard gel at home is removal. A soak-off builder comes off in acetone; a true hard gel has to be filed off, which means a drill and a much higher chance of going into your own nail. Gelish publishes soak-off removal for its Brush-On Builder, which is the specification that matters most for a home user. The full distinction is in builder gel vs hard gel.
What you actually need before you start
The shopping list is shorter than the kits suggest, and one item on it is non-negotiable.
- A UV/LED lamp with a long timer. This is the non-negotiable one. Builder gel is thicker than gel polish and needs more light to cure through, which is what a 99-second setting is for. A dual-wavelength lamp covers products from different brands; cure failures usually trace to a lamp and product mismatch.
- A builder gel. Preferably one that publishes a cure time, because the alternative is finding it by experiment.
- A dehydrator or isopropyl alcohol and lint-free wipes. Surface oil is the other half of every lifting problem.
- A fine file and a buffer. 180 grit or finer for shaping, nothing coarser near your own nail.
- A top coat, and cuticle oil for afterwards.
You do not need a drill, a primer with acid in it, or a sculpting form. All three are for jobs beyond this one.
The apex is the whole technique
Everything else on this page is prep and finishing. The apex is the actual skill, and it is worth understanding before you open a bottle.
An apex is the highest point of the overlay — a shallow dome, roughly a third of the way back from the free edge, thinning to nothing at the cuticle and at the tip. It exists because a flat overlay of even thickness flexes along its whole length, and a nail that flexes at the stress point is a nail that cracks there. The dome puts the material where the bending force is.
Beginners produce two shapes instead. The first is a flat layer, which adds thickness without adding strength. The second is an apex in the wrong place — too close to the cuticle, which looks lumpy and still leaves the stress point thin.
The way to get it right is to stop brushing. Pick up a small bead on the brush, put it down where you want the apex, and wait three or four seconds. A self-leveling gel will start to settle on its own; Gelish and ORLY both describe their builders as self-leveling, and that property is doing the work. Then turn the finger so gravity pulls the bead into the dome, guiding the edges with the brush tip rather than pushing the middle around. Flash cure for ten seconds to lock the shape before it runs, then cure fully.
Cure times, and why guessing them fails
Under-curing is the number one cause of builder gel lifting in sheets, and the reason it is so common is that an under-cured gel looks and feels finished. The surface cures first. The layer against your nail is still soft, and it lets go a few days later.
| Builder gel | Published cure | Published wear | Removal |
|---|---|---|---|
| Gelish Brush-On Builder | 30 s full, 10 s flash (on Gelish 18G LED) | 21+ days | Soak-off, brand-stated |
| ORLY Builder In A Bottle | Not published — UV/LED required | Not published | Soak-off per retail listing |
| Beetles Builder Gel 8-in-1 | Not published | Not published | Not published |
Gelish is the only bottle here that tells you what it needs, and its figures are quoted for its own 18G LED lamp — a weaker generic lamp will need longer. Where a brand publishes nothing, the practical approach is to run the longest timer your lamp has on a single test nail, and check whether the cured surface is firm under light thumbnail pressure once wiped. If it dents, it needs more.
Two further rules. Cure one hand at a time with all four fingers in the lamp and the thumb separately, because a thumb laid flat sits outside the light at an angle. And never try to cure through a thick layer by extending the timer indefinitely — light cannot penetrate past a certain depth, which is the real reason thin layers matter. The full diagnostic list is in gel polish not curing.
Taking builder gel off
This is where buying a soak-off builder pays for itself. The method is the standard gel removal, with one extra step at the start because there is more material.
- File the shine and the bulk of the top layer off with a fine file. Gelish's own routine assumes you take roughly 80% of the product off first, then soak — a full soak from scratch is a very long sit.
- Wrap each fingertip with acetone-soaked cotton. The AAD's method soaks the fingertips only, which keeps acetone off the rest of your skin.
- Leave it 10 to 15 minutes. Check one nail before unwrapping the rest.
- Push the softened gel off with a wooden stick, in the direction of growth. If it resists, wrap it again — do not scrape.
- Buff the residue lightly, oil immediately, and keep oiling daily for a week.
A builder gel that will not soften after two wraps is probably a hard gel rather than a soak-off one, which is a labeling problem rather than a technique problem. The full removal guide is in removing gel polish at home.
The five things that go wrong
| Symptom | Cause | Fix |
|---|---|---|
| Lifts at the cuticle after a few days | Gel flooded the skin, or oil was not removed | Smaller bead, placed further back; dehydrate properly |
| Peels off in a sheet | Under-cured | Thinner layers, longer cure, check the lamp wavelength |
| Cracks at the stress point | No apex, or apex in the wrong place | Build the dome a third back from the free edge |
| Lumpy, uneven surface | Brushed the bead instead of letting it level | Place and wait; use gravity, then flash cure |
| Stings or burns under the lamp | Too thick a layer curing all at once | Stop, thin the layers; a heat spike is the gel curing fast |
The burning sensation is worth taking seriously rather than enduring. It is an exothermic reaction — the gel generating heat as it cures — and a thick layer generates more of it at once. Pull your hand out, let it cool, and apply thinner next time. If skin around the nail itches or reddens a day or two later rather than stinging during the cure, that is a different problem: acrylate sensitivity, covered in gel polish and sensitive skin.
Which bottle to start with
The full roundup, with scores and the removal comparison, is in the builder gel roundup.
Picks
The gels and the lamp this method assumes
Three brush-on builders at three price points, and the lamp that cures all of them. The honest differences — including which brands publish a cure time and which do not — are in the sections above.
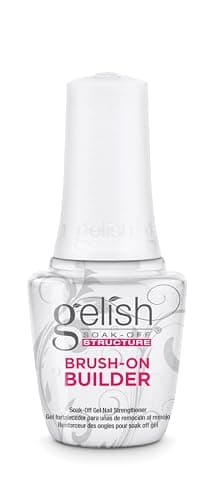
A structured overlay you can take off without a drill
Gelish Brush-On Builder (Clear)
The one builder gel here that publishes everything: 30-second cure, 21-plus days, soak-off removal, no sidewall flooding.
- Bottle
- 15 mL (0.5 fl oz)
- Cure
- 30 seconds full cure, 10 seconds flash
Skip ifSkip this if you only want thicker-looking nails for one event. This is a product for someone building a repeatable three-week routine.
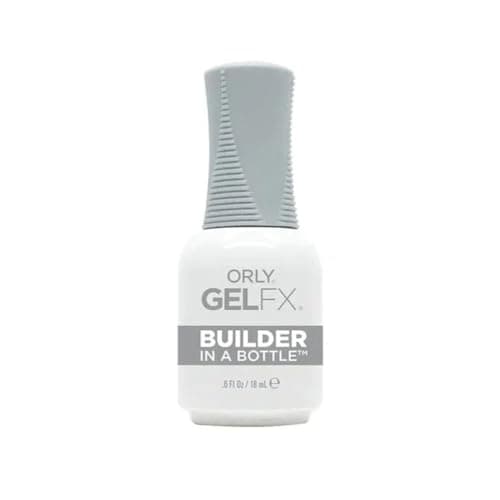
A nude overlay that disappears into the nail
ORLY Builder In A Bottle
The brush-on builder most people have heard of, in six shades including a concealer-style nude that hides regrowth.
- Format
- Brush-on, self-leveling, fast-setting
- Shades
- Six, from Crystal Clear to Cool Taupe
Skip ifSkip this if you need a published cure time to trust a gel. Gelish's bottle tells you more about itself than this one does.
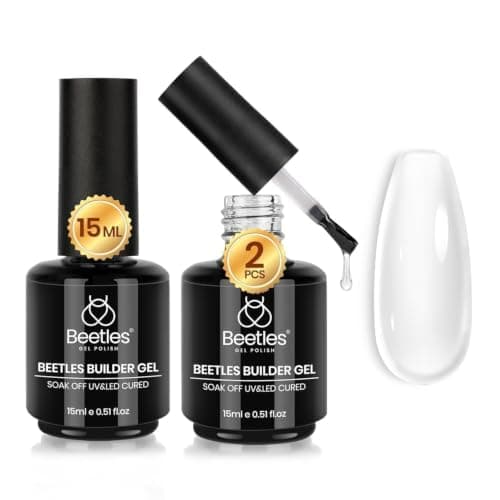
Trying builder gel before committing to a pro bottle
Beetles Builder Gel, 8-in-1 Clear
The cheapest honest way to find out whether you like building an apex at all, at roughly a third of the pro price.
- Bottle
- 0.51 oz per bottle, two in the retail pack
- Sold as
- 8-in-1 clear builder and strengthener
Skip ifSkip this if you want a published spec to work from. It is a cheap bottle that asks you to find the cure time by experiment.
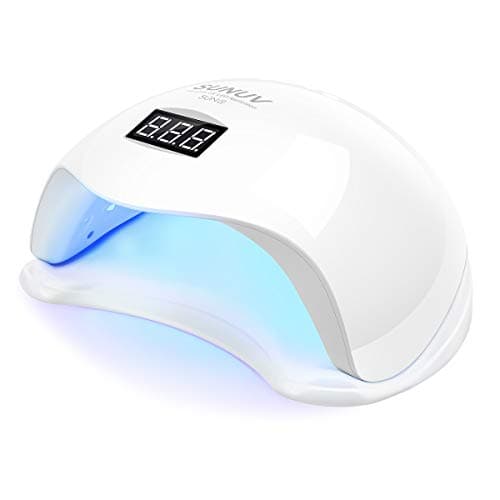
One lamp that will cure whatever gel you buy
SUNUV SUN5
Dual 365 nm and 405 nm output, four timers and a removable base — the specification most home users actually need.
- Power
- 48W, 24 dual-spectrum LEDs
- Timers
- 10s / 30s / 60s / 99s
Skip ifSkip this if you have wide hands or long nails. The larger lamp lights the corners more evenly.
FAQ
Frequently asked questions
Can you do builder gel at home?
Yes, and it is the most beginner-friendly structural gel there is, because a brush-on builder self-levels instead of needing to be sculpted. You need a UV/LED lamp with a long timer, a dehydrator, a fine file and a soak-off builder gel.
How many coats of builder gel do you need?
One thin base layer, cured, then one bead built into an apex and cured — two layers in total for most nails, three if you want real reinforcement. Two thin layers are always stronger than one thick one, because light cannot cure through excessive depth.
How long does builder gel last?
Gelish publishes 21 or more days for its Brush-On Builder. ORLY and Beetles publish no wear figure for theirs, so there is no number to quote. In practice regrowth makes a set look untidy before the gel itself fails.
How do you remove builder gel at home?
File most of the product off with a fine file, then wrap each fingertip in acetone-soaked cotton for 10 to 15 minutes and push the softened gel off with a wooden stick. Never peel or scrape it — that takes nail plate with it.
Why does my builder gel lift at the cuticle?
Almost always because gel touched the skin, or because surface oil was not removed before application. Use a smaller bead placed further back than feels natural, and wipe the plate with a dehydrator and let it dry fully before you start.
Does builder gel damage your nails?
Not by being worn. The damage risk is in removal and in over-filing the natural nail during prep — the AAD identifies mechanical thinning of the plate as the main mechanism. Buff only enough to remove shine, and soak rather than scrape.
Keep reading
Related guides
- Best builder gel →
The picks, scored.
- Builder gel vs hard gel →
Soak-off or file-off.
- Gel polish not curing →
The seven causes.
- Gel-X vs dip powder →
If you wanted length.
Sources
- —UV+EB Technology — Using the correct nail lamp · uvebtech.com
- —NAILS Magazine — The science of gels · nailsmag.com
- —AAD — Removing gel polish · aad.org
- —AAD — Reduce artificial nail damage · aad.org
- —Gelish — Brush-On Builder, Clear · gelish.com
- —ORLY — Builder In A Bottle · orlybeauty.com
- —Beetles — Builder Gel for Nails, 8-in-1 Clear · beetlesgel.com
- —SUNUV — SUN5 · sunuv.com